4”x6” card, perfect for mailing. Easy to edit and change in minutes. Instructions and the font list are included in the download file. 300dpi, CMYK, print-ready.
Download it HERE
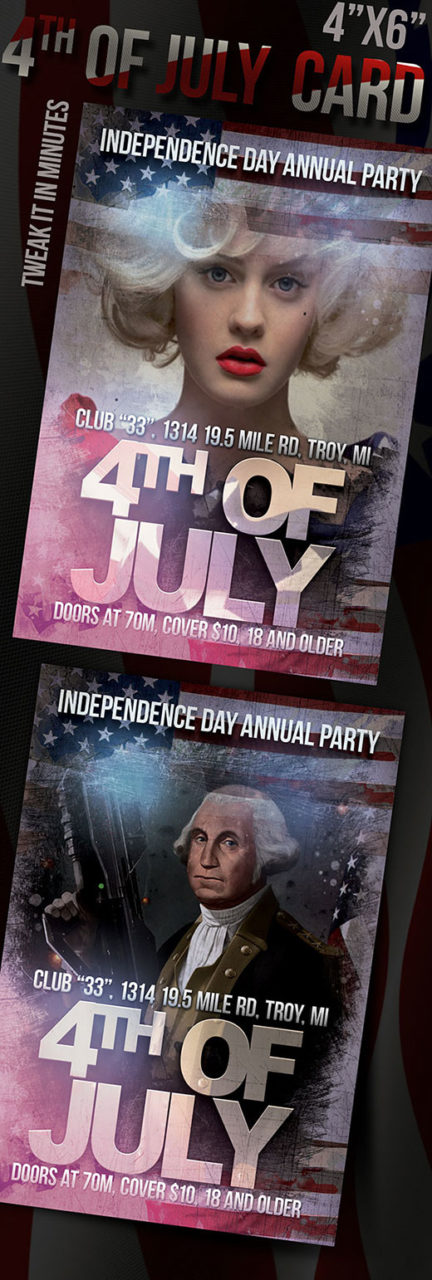
Independence Day Card
4”x6” card, perfect for mailing. Easy to edit and change in minutes. Instructions and the font list are included in the download file. 300dpi, CMYK, print-ready.
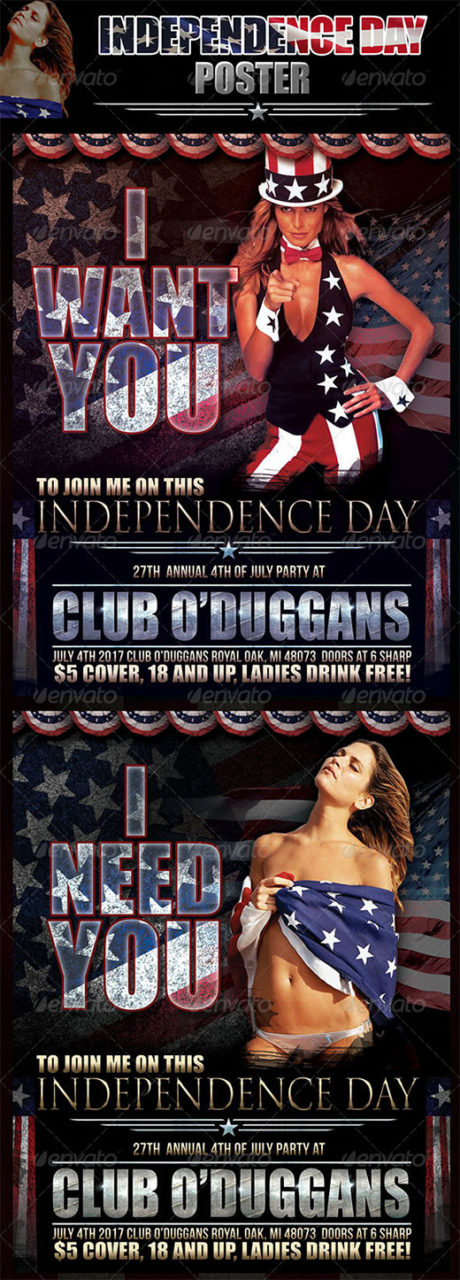
Print ready, in CMYK, 300 dpi and easy to use 4th of July Party Poster. Just import image and edit text. List of fonts used and instructions are provided in the download file.
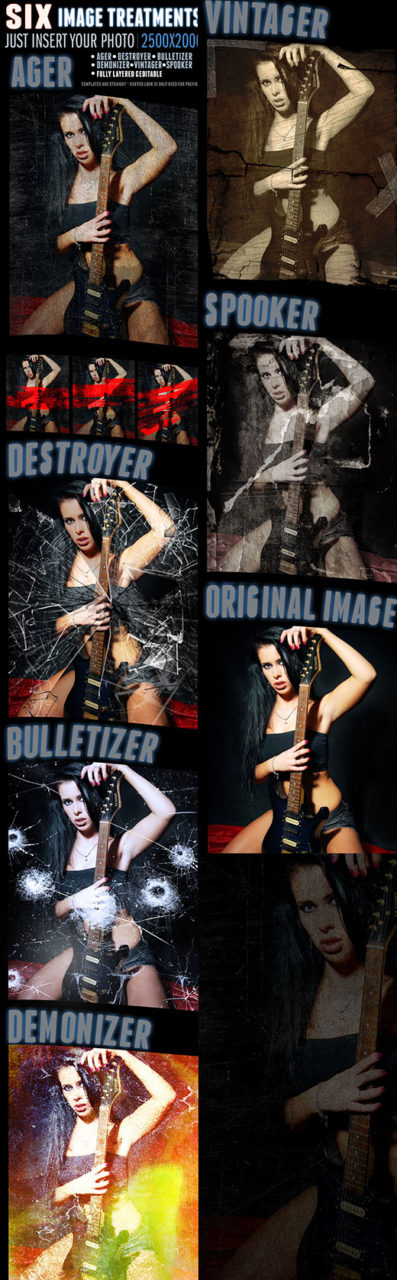
6 Dramatic Image Treatments – layered .PSD files where you only have to insert your image to the smart object named “image holder” (marked in red) by double clicking it’s thumbnail and pasting your image to fit, then saving. Included looks are – “Ager”, that ages and washes your image out, adding scratches and damage to it – with optional 3 different red streaks you can enable or disable (see examples) – “Demonizer”, creates wild burned out look of the photo being destroyed by heat. – “Destroyer” puts your image behind a shattered glass. – “Bulletizer” adds a layer of bullet holes in glass that’s in front of the image. You can move it all around, as needed. – “Vintager” creates the vintage look of damaged photo, familiar from horror movie posters. – “Spooker” adds rips, creases and cuts to a low saturated, old photo.
Bonus: – “Shirter” lets you add your image to a white shirt mockup.
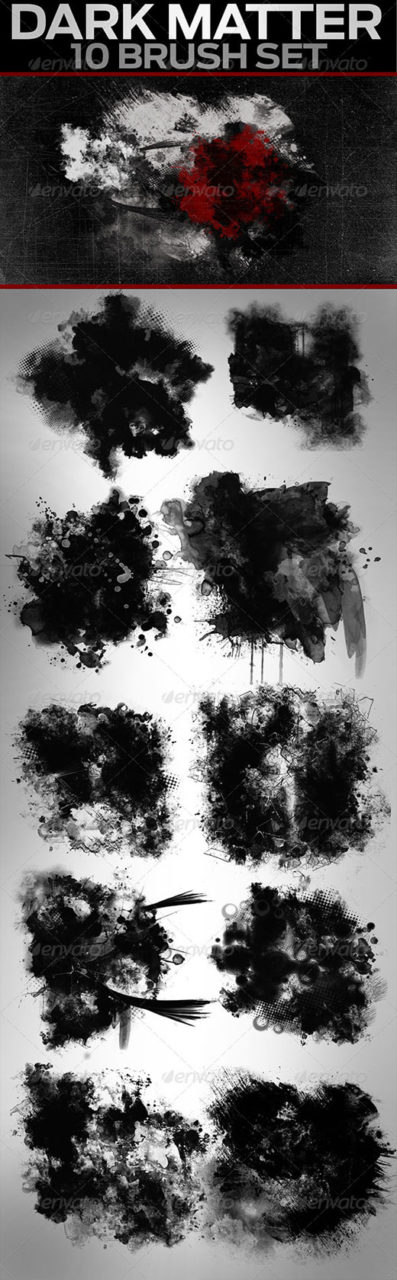
These 10 Grunge Brushes brushes are made in hi-2500×2500 pix and are the largest that currently can be. Use them for digital artwork, grunge and splash effects. Great for overlaying images and text.
Install by opening the brush panel and clicking on the menu in the upper right corner and choosing “load brushes”. then browse to the .bar file, load it. It will add these 10 hi-res brushes to your brush set.
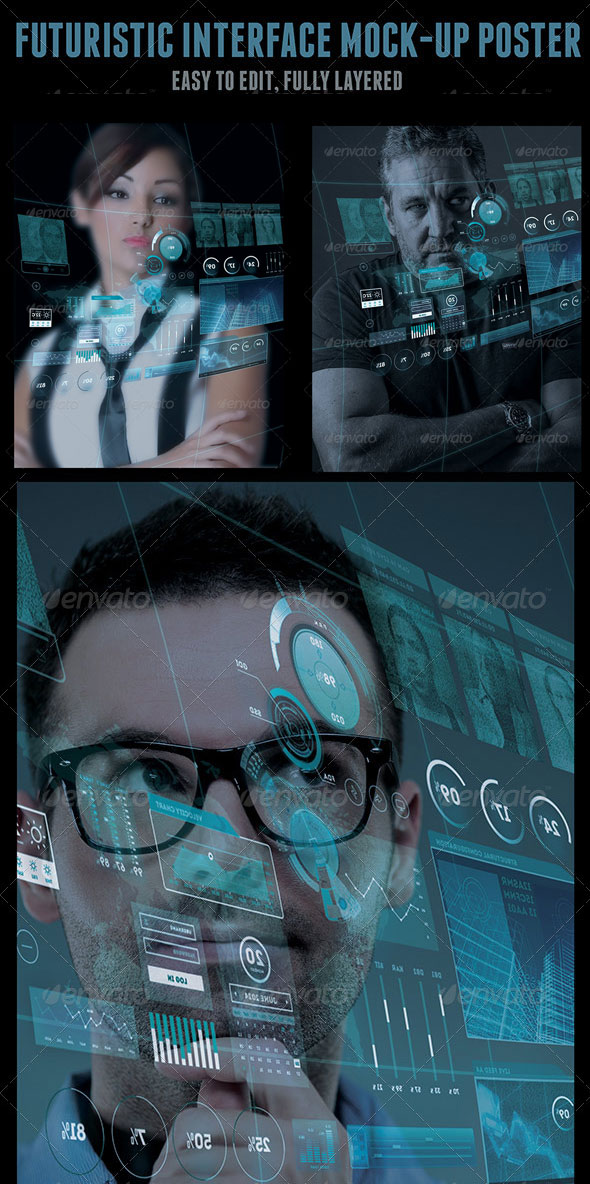
n 8.5”x11” size (300dpi, CMYK and print ready), this item is great for posters, book / magazine covers, flyers, brochures etc. Just insert your images (the ones showed in the preview are not included) and move elements as you wish. You can edit every interface and every text. Detailed instructions and font list are included in the download file.
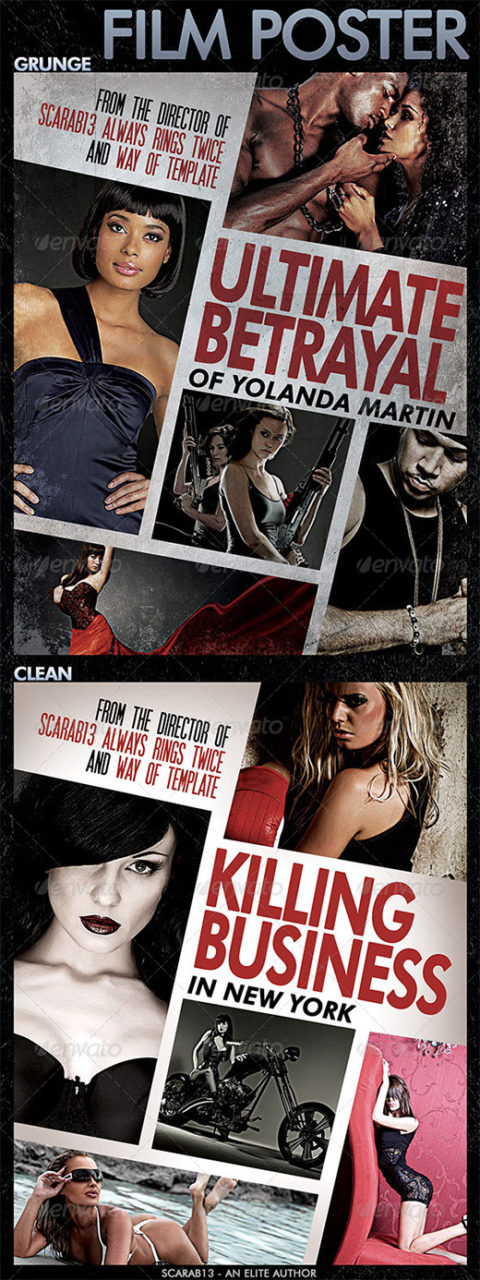
Modern film poster with 5 images to insert, and optional grunge look. To start editing first right-click smart object marked in red called “Editable”, choose “Edit Contents” and it will open another window where you’ll be able to edit text and insert images. All the image layers are marked in red, do you have to right click on each one (in the layer palette) and choose “Edit Contents”, which will open each image in a separate window. Just paste your mages, position / resize and save. It will update the main poster artwork window. All text layers are marked in yellow, so do the same thing – right click on each one and choose “Edit Contents”, then re-type text in separate windows, save and close them. It will update the main artwork window. When you’re done editing and happy with the results, save the main artwork window and it will update the Poster (your initial file). Grunge layer is marked in blue and you can disable it for clean look. Images shown in previews are NOT included.
Fonts used: – SF Movie Poster (http://www.dafont.com/sf-movie-poster.font) - Futura HV Bt (http://www.myfonts.com/fonts/bitstream/futura/heavy/)
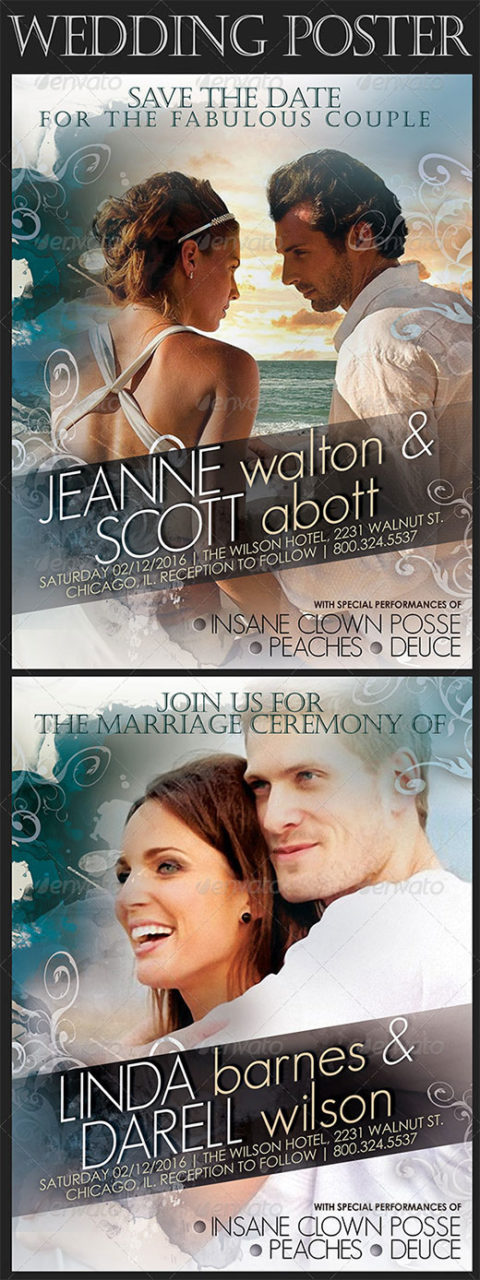
Wedding poster in movie style – Easy to modify and tweak. Just right click on image holder layer marked in red and choose Replace Contents, then browse to your own image & load it. Position as needed. Then re-type text. Try playing with the opacity of the Adjustment layer for more dramatic effect.
Fonts used are: – Century Gothic (http://www.myfonts.com/fonts/mti/century-gothic/) - Castellar (http://www.myfonts.com/fonts/adobe/castellar/) - Geosans Light (http://www.dafont.com/geo-sans-light.font)
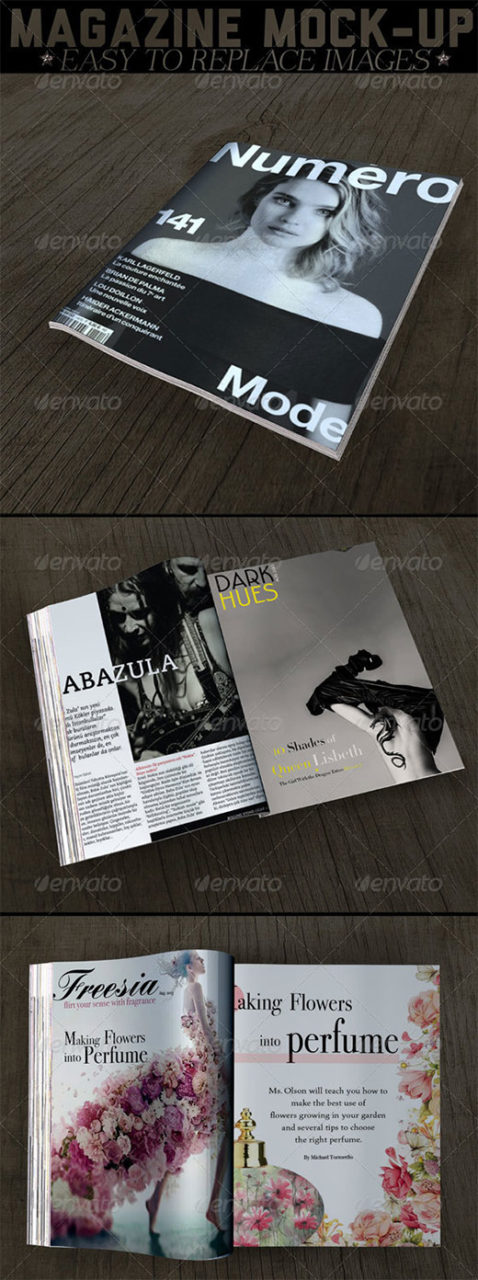
These are 3 hi-res 3000×2300 files (cover and 2 spreads) with easy to use image holders. Just right click on the image holder layer (marked in red) and choose “Edit Contents”, then paste your image in the layer called “paste image here”. Save and it will update the main image in the file. Wood texture is an optional layer that can be turned on / off. Images used in the preview are not included.